If you have a folder on your web server where users can regularly place or delete files, it is useful if you can make an incremental backup of this folder. If something goes wrong and a user has lost files or has overwritten a file, you can restore files that have been placed in the past. Here is an explanation to synchronize a folder on your web server with a folder on your Synology NAS diskstation, Via the web interface of DSM you can then make an incremantal backup of this folder with Hyper Backup. If you have a site on a VPS web server, you can back up a folder on this web server to a Synology NAS diskstation. By creating a Cronjob on your web server, you can synchronize a folder with a folder on your NAS via SSH. In the DSM web interface you can then make incremental backup of this folder.
The first step is to set up an ssh connection between the web server (VPS) and the NAS. There are two possibilities:
- Access your NAS via ssh from the web server
- Access your web server via ssh from the NAS drive
I have chosen the second option. This has the advantage that you do not have to make any settings in your router. This possibility therefore also entails fewer security risks.
Step 1: Create a user who can access the web server with ssh
Create a new user via the web interface DSM of your diskstaton. Make this user a member of the administrators and users group and give read and write permissions for the homes folder under permissions. From a local computer, open the terminal and log in to the diskstation with your admin account:
ssh admin@diskstation.local
sudo vi /etc/passwd
and for this user, change "/sbin/nologin" to "/bin/sh". This ensures that the new user can log in via ssh. The annoying thing is that this is restored every time the diskstation restarts or when you make adjustments in the user configuration. The value for this user must therefore be adjusted every time after a restart or user adjustments. If everything is set up correctly, logging in via ssh is no longer necessary for the new user so this is not that bad, but you have to take it into account.
Step 2: Create a user on the web server
Also create a new user on the web server. Make them members of the Apache and wheel group. In the example, I call this user "backup". Make sure that when creating this user, a home directory is also created for this user. Make it possible to log in to your Diskstation with an ssh by adjusting the configuration of the sshd_config:
sudo vi /etc/ssh/sshd_config
Add the following lines to enable ssh login:
AllowUsers backupMatch
User backup
	PasswordAuthentication
	KbdInteractiveAuthentication yes
Step 3 Use Public/Private Keys to log in
First, see if you can log in from the Diskstation on the web server. Log in with ssh on the Diskstation with the new user:
ssh new_user@diskstation.local
Then you try to log in to the web server from there:
ssh backup@webserver.nl
If this succeeds, create an ssh key on the Diskstation with ssh-keygen. Accept the default location. At enter password phrase do not enter anything. A public and private key is now created. Copy the public key to your Diskstation with:
cat ~/.ssh/id_rsa.pub | ssh backup@webserver.nl "mkdir -p ~/.ssh && cat >> ~/.ssh/authorized_keys"
Make it possible to log in to your web server with an ssh key by adjusting the configuration of the sshd_config
sudo vi /etc/ssh/sshd_config
Change the lines:
#RSAAuthentication yes
#PubkeyAuthentication yes
#AuthorizedKeysFile .ssh/authorized_keys
File .ssh/authorized_keysto:
#RSAAuthentication yes
PubkeyAuthentication yes
AuthorizedKeysFile .ssh/authorized_keys
Log out and try to log in to the web server again with:
ssh backup@webserver.nl
You shouldn't be asked for a password anymore. This is necessary to perform an automatic task from the diskstation. You can now adjust the sshd_config on the web server. The rules:
Match User backup
	PasswordAuthentication
	KbdInteractiveAuthentication yes
are no longer needed.
Step 4: Sync a folder on your web server with a folder on your diskstation
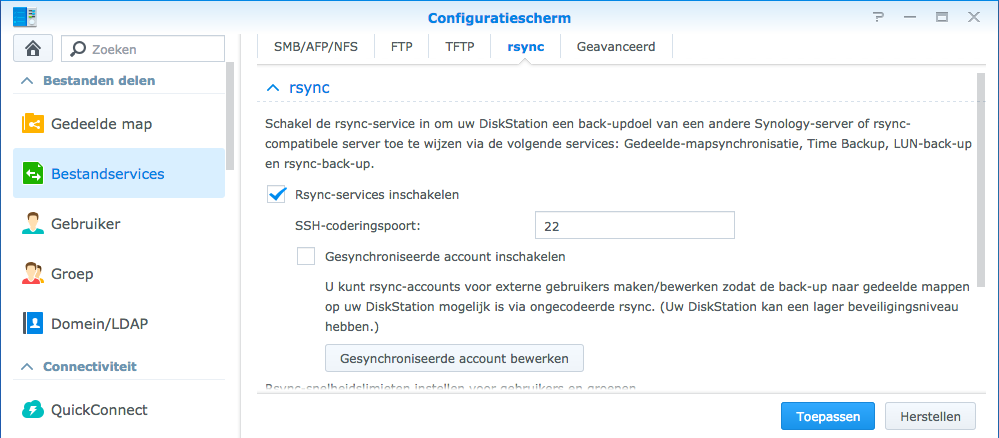
To test, it is useful to create a folder "data" on the web server in the home folder of the backup user and to place some files in it. First, make sure file services have the R-sync service enabled.
Go to the home folder of the new user via the DSM interface. Create a folder in which the synchronized data comes and create a script backup.sh with the following code:
#!/bin/bash

USER="backup"
SERVER="ip-addres of server naam"
SOURCE="/data/"
TARGET="/volume1/homes/new_user/backup/data/"
LOG="/volume1/homes/new_user/backup/data/backup.log"

rsync --delete -avz --stats -zav $USER@$SERVER:$SOURCE $TARGET >> $LOG 2>&1
Test the script first by logging in with the new user via ssh. You then enter the home folder and run the script:
./backup.sh
If all goes well, the files that are in the data folder of the web server are now placed in backup folder. You can now adapt the web folder to the folder you really want to back up, e.g. /var/www/html. If it does not work, check the permissions of users and folders.
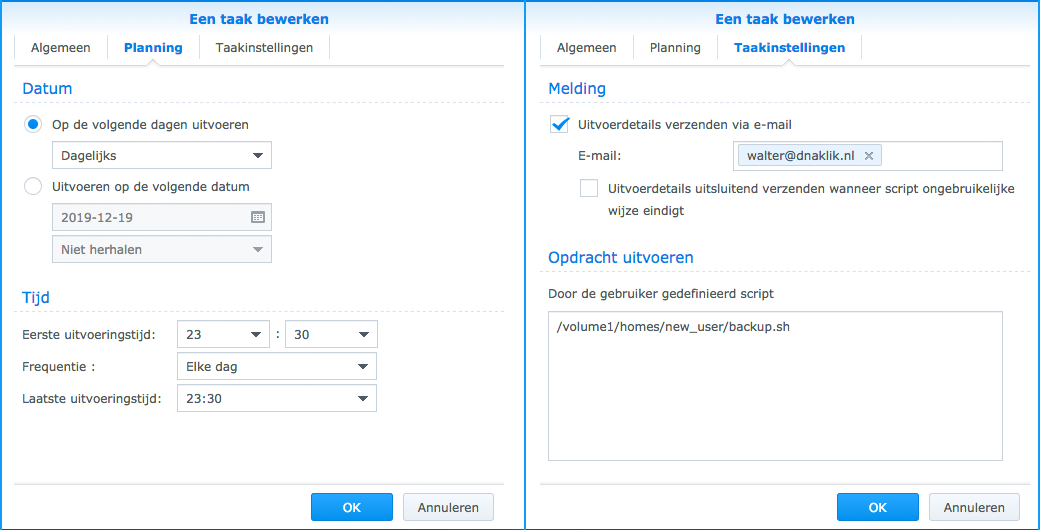
In the DSM interface, go to the Task Scheduler. Create a new task:

Fill in the tabs. In general the "new_user". When planning the frequency to run the script and under Task settings you refer to the script.
Step 5. Make an incremental backup of the folder on your diskstation
Go to the web interface of DSM and go to "Hyper backup". Click + in the lower left corner. Choose Locale folder & USB.
Or if a backup task has already been set up, go to edit:
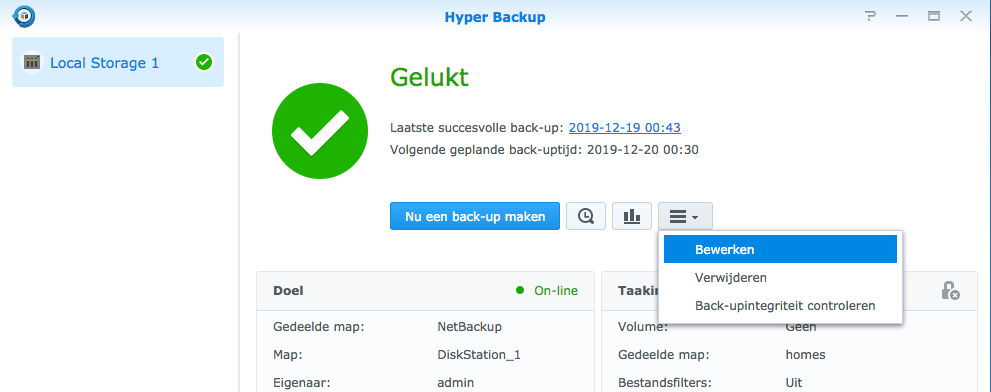
You will then receive a folder list in which you can select the folders that you want to make a backup of. A comprehensive guide to creating backup tasks can be found on the site of www.synology.com.